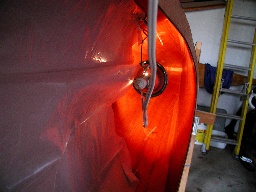
This is the view inside the cockpit once the deck has been wired on for the last time. The front footbrace studs (with the threads taped), the stitches and the various taped seams are all visible. The stempiece is basking in the flahbulb's glare.
While I was tacking the hull/deck seam, I gently pried up the deck at the bow & stern and applied a glob of putty to the top of the stem and stern pieces.All that surface area made a very strong bond that helped to immobilize the deck.

The string identifies the boat's centerline so that the coaming does not go on crooked. The 4-mil polyethylene film keeps the coaming from sticking to the deck. It also collect any drips. It's available at any hardware store as plastic painters' tarp and is one of the most useful items when building a boat. Epoxy will not stick to it. Some builders use waxed paper for this, but the heat from the curing epoxy can melt the wax and contaminate the joints. This is not a problem with polyethylene.
After this shot was taken, the top of the spacer was buttered with epoxy/woodflour mix and the next spacer was put on.

All the layers (spacers and coaming) are glued up and waiting for the epoxy to cure. Once all the epoxy is cured, the boat will be ready for taping the deck to hull and the coaming will be ready for cleanup.

Ready for sanding (with no obstructed parts). Don't forget a fillet where the coaming meets the spacer. This eliminates the stress concentrator formed by the right angle and helps keep the coaming from breaking off.

When I was wiring the deck to the hull, I noticed that the area where the cockpit deck former used to be seemed to have a lot of strain on it when maintaing the correct deck curve. So, just in case, before I took the wires out, I wrapped that part of the boat with that plastic shrink wrap that's available at packaging stores. Then I took out the wires. There was no problem with the deck trying to break the tacks.
You can also see in the picture how I made the tacks much larger than the earlier ones inside the hull to support the more drastic curve.

The boat is securely fastened on its side to the sawhorses, the light has been installed in the cockpit and the tools are ready.

The 2 putty knives from filleting the seams are now attached to 48-inch handles (the one in the middle is so rough because I ran out of broomsticks and had to improvise). They are used the same way as for the other fillets. I also used the flat one to guide the tape while I was unrolling it.
The brush on the left is used to unroll the saturated tape and to smooth the tape and epoxy onto the fillet.

Sort of looks like the Hellmouth, doesn't it? This is the step that I looked forward to the least. I was really wishing that I could use good old reliable sheer clamps. However, all my friends on the CLC builders' forum who had built boats that used this method told me that it was much easier than it first seemed.
Since I didn't really have a choice, I donned my scarf (to keep the epoxy out of my hair), safety glasses and respirator, latex gloves and long-sleeved old shirt. I picked up my tools and dove into the inferno.