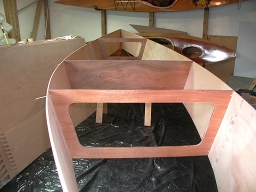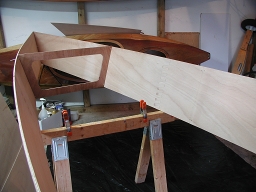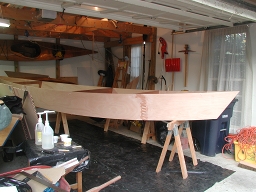
The ends of the hull panels are stitched together. Bulkheads A, C, D and E are stitched into place. Mold B is not installed yet. The hull is 1/4 inch BS1088 okoume. The bulkheads are 3/8 inch BS1088 okoume covered on both sides with 4 ounce woven glass. Each bulkhead is stitched only at the shear and bottom. The shear line stitch holes will be covered by the rubrails, the bottom holes will be covered by the graphite/epoxy coating on the bottom. The only exposed stitch holes will be at the center of the bow and stern.
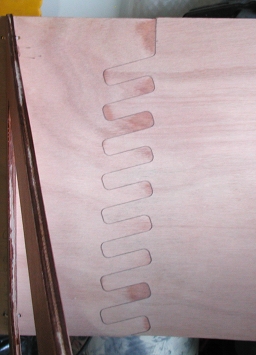
On the left are the unjoined plywood pieces, with their pre-cut puzzle joint fingers clearly visible.

Bulkhead D in the foreground is the back of the cockpit. The solid bulkhead C is the front. The open bulkheads form a 2-inch stiffener for all the surfaces they contact. Once they are taped in place, they will form a continuous T-beam around the inside of the boat.
A set of puzzle joints is visible near bulkhead D. Note how the curve of the side remains fair, even when passing through the joint on the left side.

Here's bulkhead A and the hold. Another puzzle joint is also visible, as is the future location of mold B. The spring clamps keep the hull from sliding off the sawhorse, if bumped.

Looking back from the cockpit to the stern showing bulkhead D again, as well as bulkhead E. Bulkhead E forms an odd little triangle compartment that I'll have to try and find some use for. It'll be airtight and watertight, wih no openings.
There's yet another view of a puzzle joint. Also visible is an edge-view of the plywood. Note the 5 plies in only 1/4 inch thickness. The odd speckling in on the upper right corner of bulkhead D is the unfilled weave of the glass catching the flash from the camera.

As strong, smooth and flexible as a scarf joint, but faster to assemble. Cut for you on a CNC machine by the good folks at Chesapeake Light Craft , with a fit tight enough that even dry you can pick up up the pieces (carefully!) as a unit.

The shear curve has formed up nicely, the lines are fair and match Bolger's original and everything is holding together. Time to take it all apart, glass the inside of the hull panels and put it back together again for real.