
The bulkheads bonded to the hull panels. Temporary mold B is visible in the middle of the hold.
The outside of the hull is still bare wood at this point. All the other surfaces are glassed

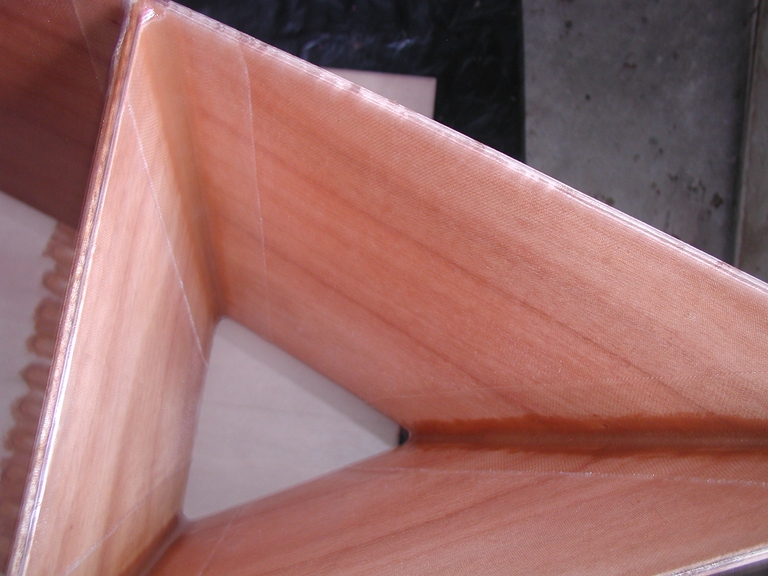
The tape and fillets are visible, as is the bottom curing on the shop floor under the boat.
Removing the ties produces very thin fillets which result in the most economical (less epoxy) and strongest (per unit weight) joints. Glassing the wood before assembly while everything is flat minimizes epoxy use, too. It also results in a neater job with minimal sanding and less labor time.
It does, however, take more up-front calendar time. If you use this method, you won't be getting to a 3D hull as quickly as if you'd just slapped it together and applied the glass later. However, you will get a neater job and make up for lost time by skipping a lot of sanding in the future.
With no stern piece. Bulkhead D is on the left, the stern is on the right.
The glass tape holds the stern together every bit as well as a wooden stern piece. The 1/4 inch thick hull panels are thick enough that they need no backing from a stern piece. Not only is the joint much lighter than a stern piece, it also needs no beveling. Stronger, lighter and less labor. Who could ask for anything more?

With no stem piece. Same advantages as at the stern.

A taped seam meets a puzzle joint. The puzzle joint is now glassed over. The tape for the joint between bulkhead D and the starboard side of the hull is plainly visible.
Once the epoxy was fully cured, it was possible to pick up the entire boat by grabbing bulkhead D and using another hand to balance the front of the hull. The boat flexed sideways, of course, since it had no deck or bottom, but there was no sense of fragility. It felt (and was) very solidly joined.

Here the sections of the 1/2 inch thick bottom sheet are being glued up. The wood has been roughly cut to the approximate outline of the bottom, with tabs left at the puzzle joints to aid alignment. It will be trimmed to the correct size when the bottom is attached to the hull. Lead weights protected from epoxy by a layer of shrink wrap keep the wood immobilized until the epoxy cures.