
This is the mandrel, the core for the construction of the mast. The metal tube is 1.25" electrical conduit. The foam is 2" 0D pipe insulation. The wooden dowel is used to extend the 10' conduit to 10'3" and to provide something to rest on the sawhorses with. I rubbed the conduit with olive oil before putting the foam on and turned and slid the foam to work the olive oil in. Normally this should not be necessary, but I was getting set to diverge from the instructions (sorry Jacques!).
The dowel and conduit are temporary and not part of the final mast. Neither they nor the pipe insulation foam are included in the kit. They are available at any large hardware store for about $20.
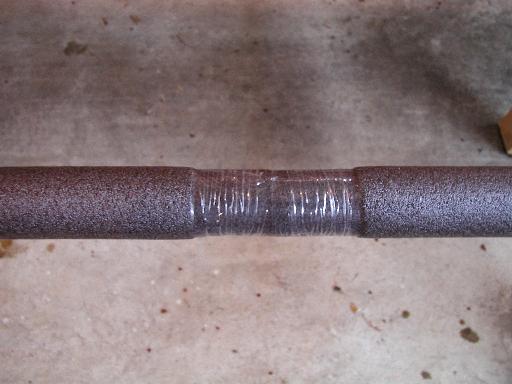
Here's my divergence. The instructions call for externally reinforcing the mast at stress points with few layers of tape. I wanted a constant diameter mast, so I compressed the foam with packing tape to make room for the reinforcements internally. When you do this, the foam clamps on to the conduit and makes it a permanent part of the mast if you're not careful. Hence the olive oil. With attention to the amount of compression and lots of olive oil, the foam should be able to rotate by hand, albeit with some effort.

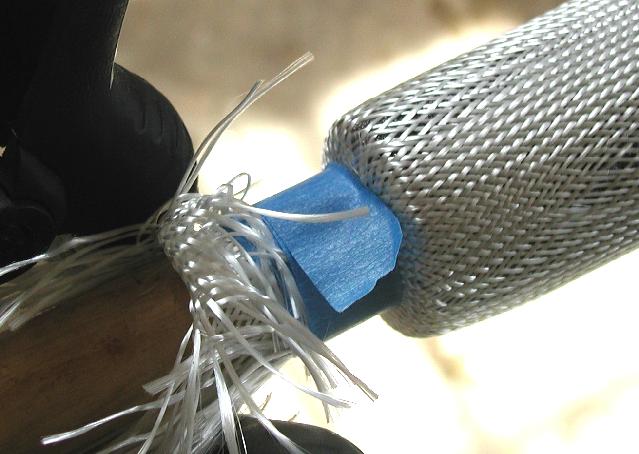
Here's the reinforcements for the step end and the mast partner. There's one more near the center for the snotter halyard. Note the blue stripe in the near reinforcement. That's tape that I used to keep the glass tape end from fraying. You're seeing it through 7 layers of glass tape. The three reinforcements took 14' of 4", 6 oz tape and 3 oz of epoxy (with about 1/2 oz waste). I pre-impregnated the tapes on a plastic-covered workbench, then wrapped them around the mandrel. Once they've cured, be sure to clean off the selvedges or they'll snag the hell out of glass sock when you pull it up.
The glass tape is not included in the mast kit. If you don't have any scraps left over from building your boat, you'll want to order some at the same time you order your kit.
After pulling the glass sock up the length of the mast, tie it off and start rubbing down the length of the mast until the sock won't stretch any more. You need to squeeze VERY hard. In my case I was able to pull 1.5' of glass back off again. So don't cut the glass until you've finished pulling it back down or you might find yourself short of material.
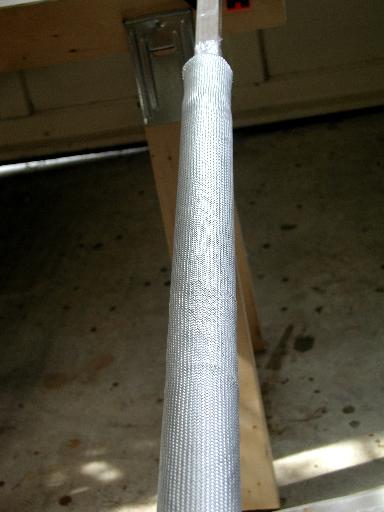
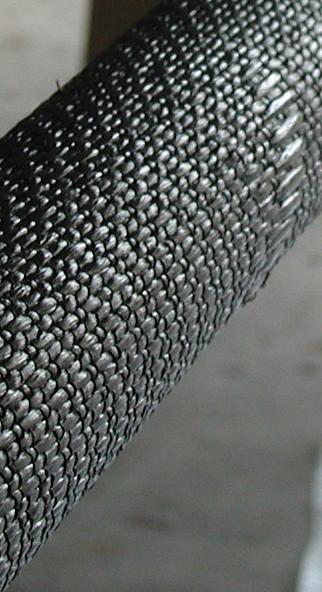
Here's the view down towards the step end, all ready for epoxy. Note the silvery white translucence of the glass before the epoxy is applied.

All wet out and transparent enough to see the black foam underneath (which is why it's silvery black instead of silvery white as above. The weave is also plainly visible. Fully transparent glass and visible weave indicate a good inner lamination layer with no excess epoxy. The 10'3" section took a 6 oz batch, of which at least 1 oz ended up on the floor (don't forget the dropcloth!). Once the glass is wet, you use your gloved hands to work in the epoxy all over. You also run your hands up and down the mast to squeeze out any excess. As the epoxy cures, repeat this process until it stops dripping and you won't have to sand. I also rotated the mast, like a rotisserie, to avoid drips.
BTW, this was the first time I used e-poxy for a project. It worked just fine. The main difference, besides the color, between e-poxy and the S3 that I'm used to, is the smell. S3 smells sort of like rancid nuts, e-poxy like a spoiled fungus that I used to encounter in the hills behind San Diego.
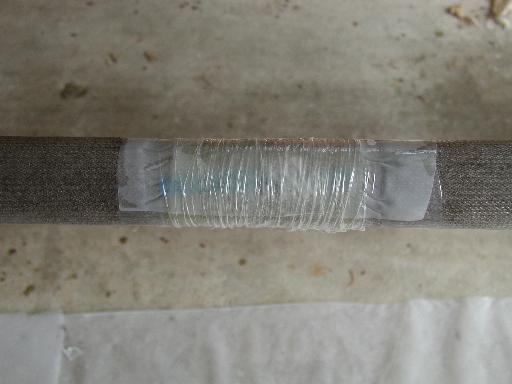
When the wet-out was done, I wrapped the reinforcements in 6-mil polyethylene and secured that with packing tape. This was to smooth the transition between the foam and glass reinforcements, and to make sure that the sock adhered well to the reinforcements.
The step end after the epoxy has cured and the plastic and tape has been removed.


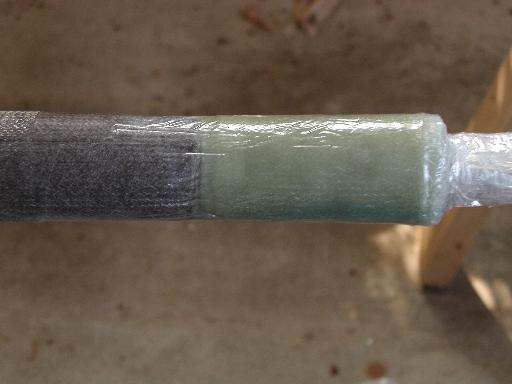
Jump ahead a few steps and here's the carbon fiber layer, all wet out and cured for 12 hours. This carbon fiber is amazing stuff. First off, it's a ridiculous amount of work to get a good photograph of it. Depending on the light angle, it's either dead black or dead black with shiny highlights.
The carbon fiber sock is thicker and heavier than the glass sock. Instead of being held together by the bidirectional weave, as is the glass, it has little elastic threads. As soon as I let go of the opening, it snapped shut. This required a different technique for pulling the sock onto the mandrel. It also meant the sock length didn't change anywhere near as much as the glass sock's did. The fiber's thickness also pretty much filled in the last of the unevenness around the reinforcments.
Visually, it's sort of confusing to look at. The dark color and strange highlights absorb a lot of the visual cues and changes in shape. It's sort of like trying to determine an F-117's true shape. This visual confusion makes a big difference when wetting it out. Glass turns transparent when it's properly saturated. Carbon fiber justs gets a different kind of glossy.
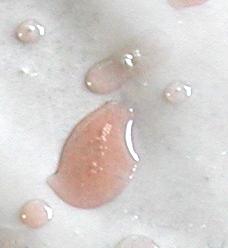
Faced with the possible loss of a $200+ investment, I decided to brute force the issue and made up twice as much epoxy as the glass layer had taken and slathered it all on. Then I massaged it into the fiber with gloved hands. When every surface was covered and dripping, I started the same squeezing that I'd done with the glass layer and kept it up for as long as the epoxy kept coming out (the drips came out pink!). I mixed 12 oz and my guess is that 2 or 3 oz ended up on the floor and in the cups, on the stirrer, etc. So it seems to have taken about 1/2 again as much epoxy as the glass did.
The other thing that was amazing was how quickly it got stiff. Just as soon as the epoxy started to kick, I could feel the mast getting less flexible. I've never felt anything like that with glass. After only an hour's cure at 80 degrees, while the epoxy was still tacky, the mast no longer flexed when I gave the mandrel a light twitch. 12 hours later I could tap on it and get a hollow knocking sound.
Statistics as of today - 21 oz epoxy mixed, 16 to 18 oz in the assembly. 14' of 6 oz, 4" tape, 1 glass sock, 1 carbon fiber sock, and 10'3" of pipe insulation foam. If I had it to do over again, I'd mix less epoxy for the carbon fiber layer. Also, while the massaging and squeezing technique makes for very nice layups, it's taken over 2 dozen disposable gloves so far. Be sure to have plenty on hand before you start.
Day 3 - Hit a bit of a snag tonight. I went to put on the outer layer of biax and found that the piece I had was too short by almost 4 feet. Looks like no allowance was made for stretching when it was pulled off the roll. Fortunately, the supplier was very nice about trading pieces and a correctly-sized piece is on the way.
Day 7 - Decided to remove the steel conduit core this morning. The CF had cured for 3 1/2 days, so I figured that it was now strong enough in case I had to do some "convincing" for it to come out. I also didn't want to wait too much longer just in case the olive oil wasn't going to work as planned. But it did. I just grabbed the lip of the conduit with vise grips and pulled while turning it. It came right out, but did require a steady firm pull. The only difficulty was when the distance between the end of the pipe and the end of the mast approached my arm span. A second person would have been helpful. The mast still needs its final layer of biax and paint, but as of now it weighs about 2 lbs according to my bathroom scale. With the ends on sawhorses, I can lean most of my weight on it and it only deflects an inch or so in the center. It's really amazing how light it feels. I've picked up cardboard tubes the same size that weighed more. It's hard to believe that it's strong enough to lean on.